How do I find the right room for my meeting in Outlook?
A quick guide to perfect room booking
Meeting Room Booking with Outlook: Simple Steps for Organization
When multiple teams and departments rely on meeting rooms simultaneously, a clear booking structure is essential to maintain oversight. Room allocation can quickly become a challenge, especially when last-minute requests or spontaneous plan changes arise. While a central calendar can help, without a well-thought-out booking strategy, misunderstandings or bottlenecks can easily occur. It’s crucial to ensure that every room is available at the right time and that coordination runs smoothly.
Outlook provides a practical foundation for booking and managing meeting rooms. With the Scheduling Assistant and the Room Finder feature, available rooms can be selected and reserved efficiently. This enables quick organization and simplifies the planning process for all types of meetings. The following steps show you how to book a meeting room in Outlook while directly checking its availability.
The limitations of Outlook in room booking
Despite its helpful basic features, Outlook as a room management tool quickly reaches its limits with intensive use. It doesn’t offer a central overview for booking multiple rooms simultaneously or provide color coding for booking statuses. This can reduce clarity and make the coordination process time-consuming, as rooms must be checked individually and bookings updated manually. Particularly when changes arise in the room schedule, this can require additional steps, slowing down the organization process.
Step 1: Create a new meeting
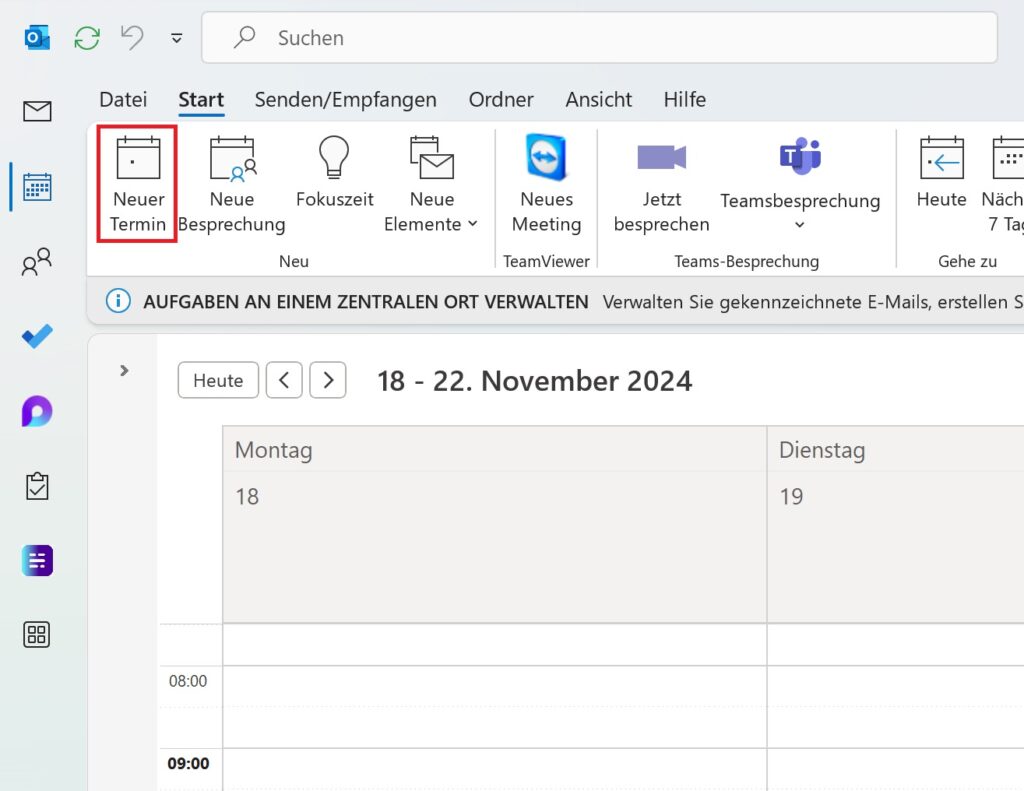
- Open Outlook and either navigate to the calendar view via the calendar icon or stay in your email view.
- Click on “New Appointment” or “New Meeting” in the menu bar to open a new meeting window. Alternatively, you can double-click on the desired day in the calendar and then select “New Meeting.”
Step 2: Open the Room Finder
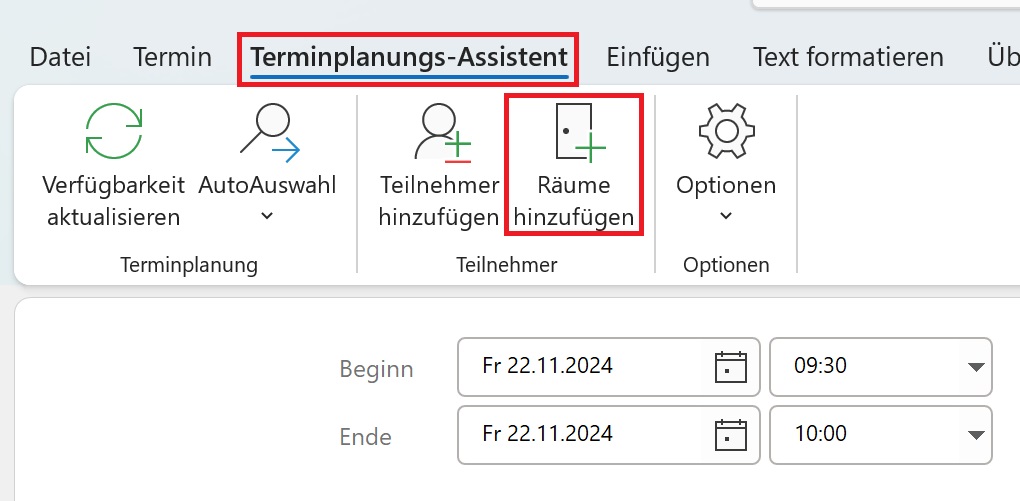
- To open the Room Finder, there are several ways: Either select the “Scheduling Assistant” from the ribbon menu and then choose the “Room Finder” option.
- Alternatively, select the “Teams Meeting” option and click on the “Room Finder” icon that appears to the right of the “Location” field.
- This feature is particularly helpful because it displays all available meeting rooms and their status for the specified time.
Step 3: Select and filter the appropriate room
Select a location:
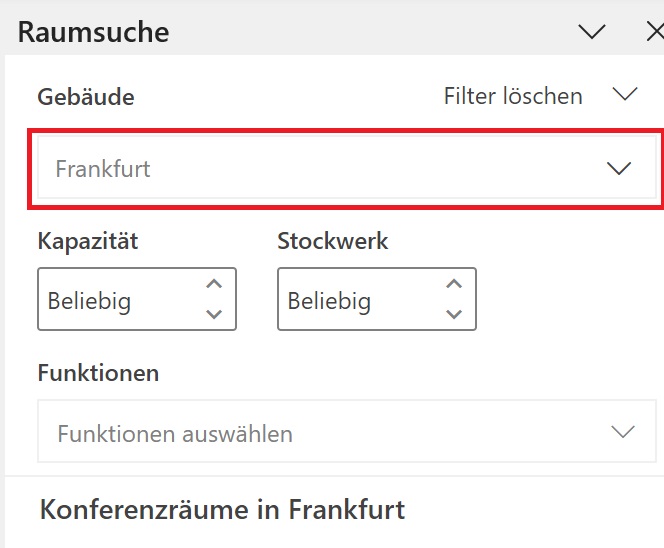
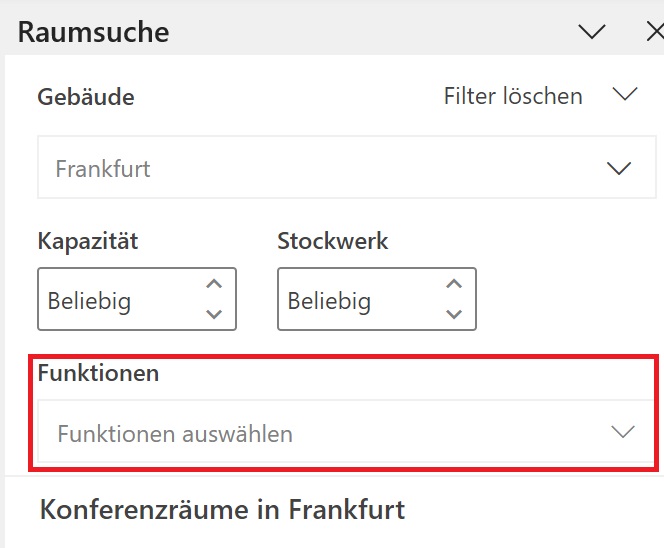
- n the Room Finder, you can first choose the desired location. For example, if you work in a larger company with multiple buildings or floors, select the building or floor that is best suited for your meeting.
- This will streamline the room list and display only the rooms available for that location.
- n the Room Finder, you can first choose the desired location. For example, if you work in a larger company with multiple buildings or floors, select the building or floor that is best suited for your meeting.
Check capacity:
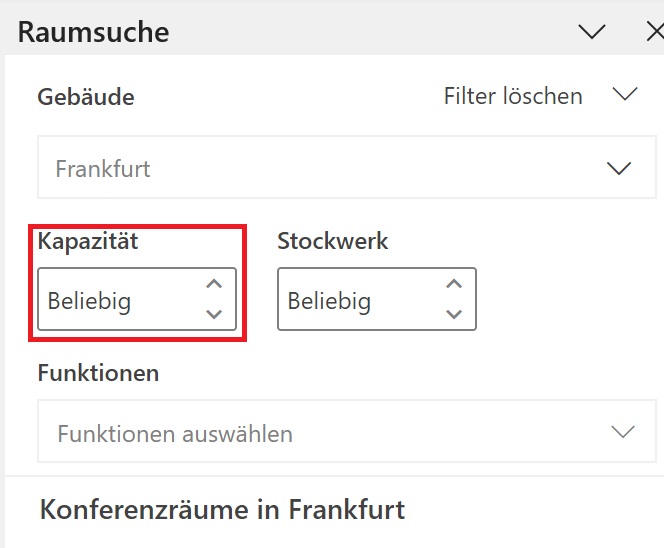
- Make sure the room is large enough for the planned number of participants. The capacities of each room are stored, and the selection adjusts based on the number of people entered.
Select equipment (optional):
- Do you need a room with specific equipment? Some rooms are marked with features such as audio, display, video, or accessibility. As this selection can be customized, additional functions can also be displayed.
- If you require specific equipment, filter accordingly. This further narrows down the list, helping you quickly find the right room to meet your needs.
Step 4: Use the Scheduling Assistant
The Scheduling Assistant is especially useful when planning a meeting with multiple people whose availability you need to coordinate.
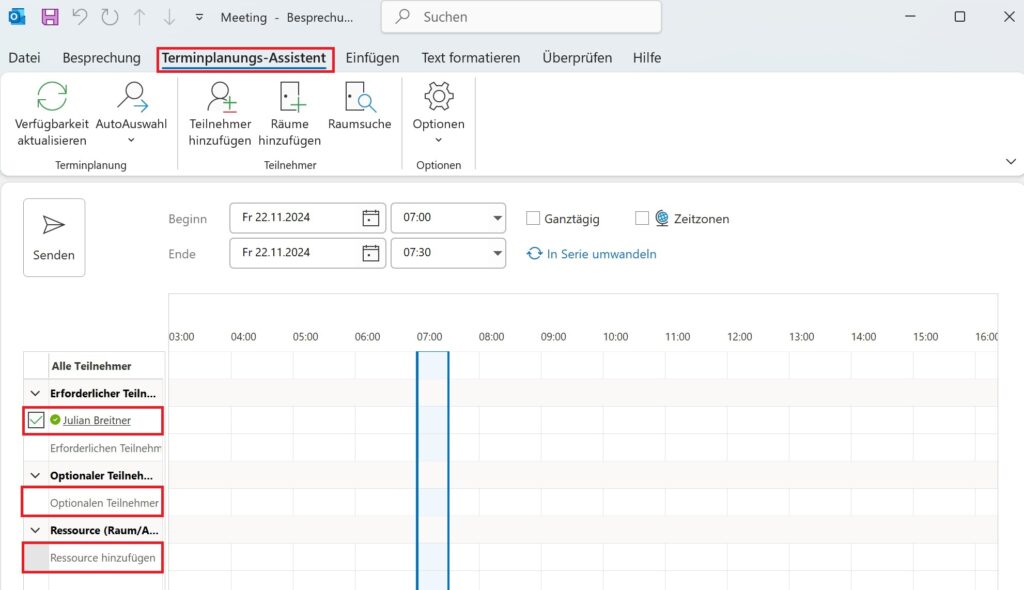
- Click on the “Scheduling Assistant” to access the scheduling view.
- In the Scheduling Assistant, you will see an overview showing the availability of all invited attendees and the selected room. Under “Add Required Attendees” and “Add Optional Attendees”, you can invite additional participants to the meeting.
- If the planned time does not work, you can select an alternative time here that is free for all participants and the room. The room can also be adjusted under “Resource”.
- Move the time slot on the timeline to ensure all participants are available, and the room is free at the desired time.
Step 5: Confirm the room and time
- Once you have found the appropriate room and time, confirm your selection.
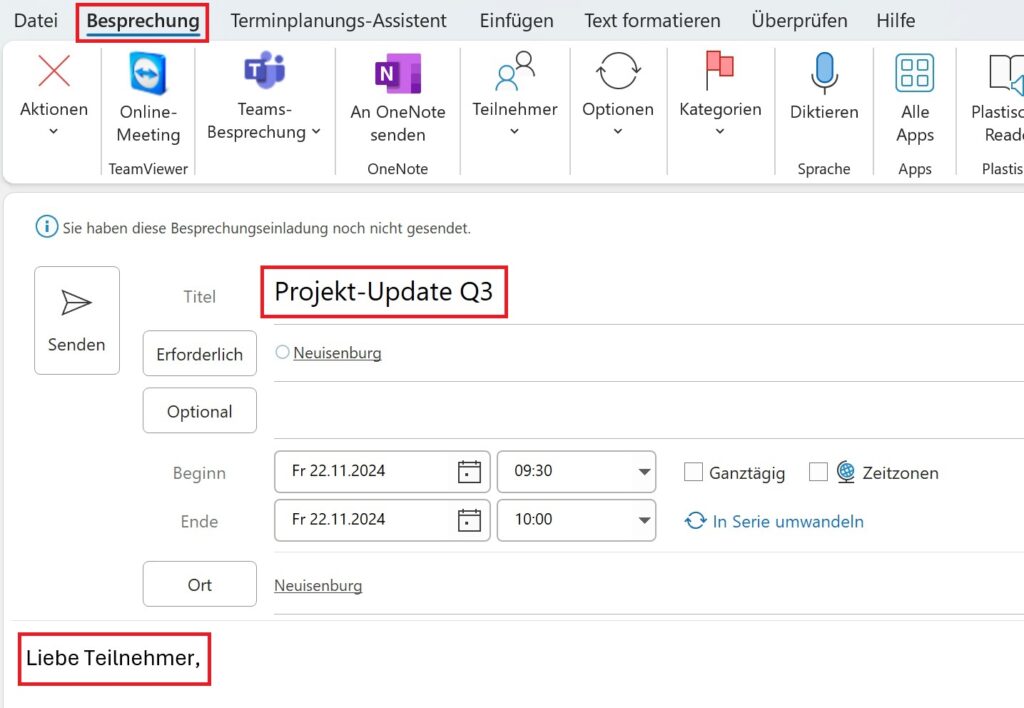
- Return to the main meeting window under “Meeting”, where the room and time are now entered.
- Give your meeting a clear and descriptive title so that all participants immediately know what it’s about, for example: “Project Update Q3” or “Marketing Strategy Meeting.”
- If needed, add a brief description to note agenda items or other important information for the meeting.
Step 6: Review details and send the invitation
- Check all details carefully, especially the room, time, and the list of participants.
- Click “Send” to dispatch the invitation.
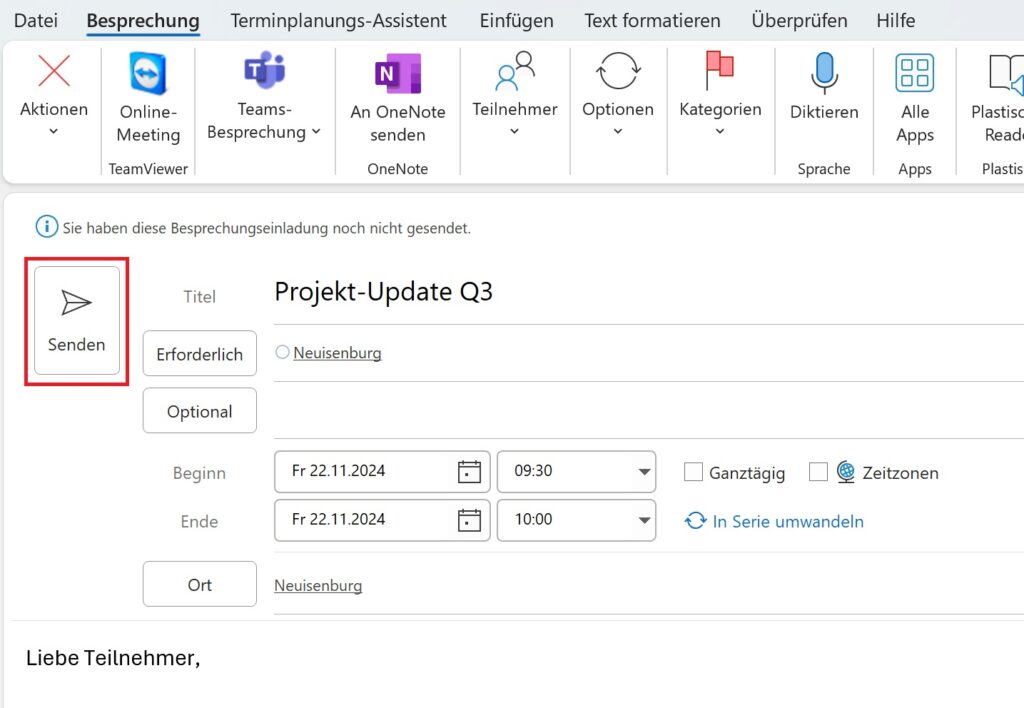
The invitation is now sent to all participants, and the room is automatically reserved for the meeting. Participants receive an email with all meeting details, including the reserved room and time.
Better with arbooMEET! How we can support you
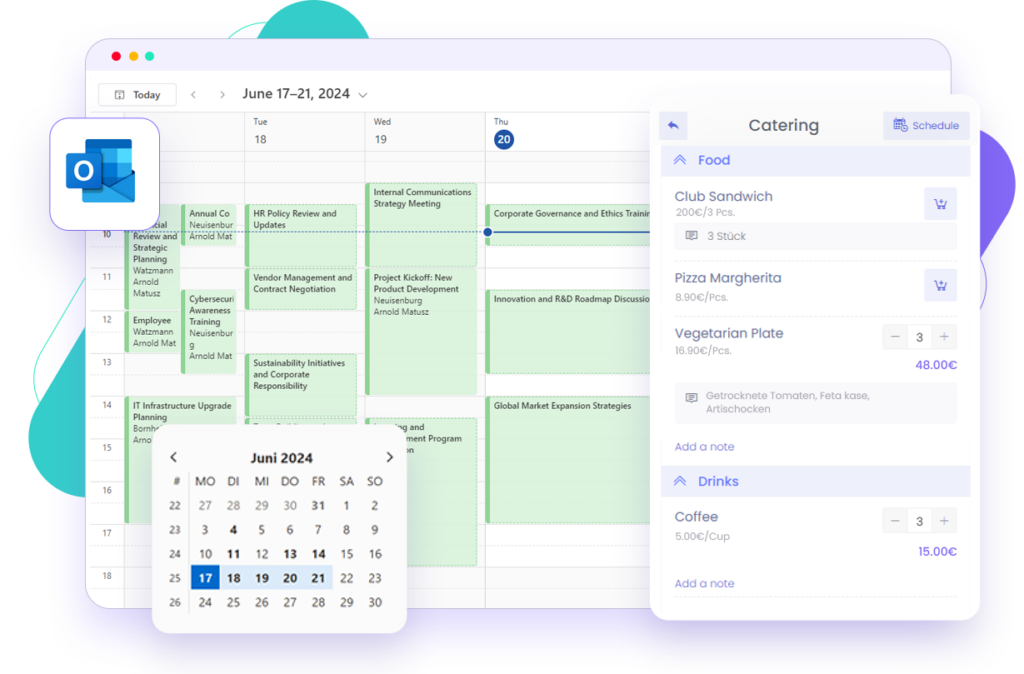
With the right planning, meetings can be quickly organized in Outlook. If you need additional features such as catering, equipment, services, seating arrangements, and more, we recommend arbooMEET. This allows you to book all the details for a successful meeting directly in Outlook. Feel free to contact us for more information!
Related Content
Meeting Room Booking as It Should Be, Straight from Microsoft Outlook


